How New Cabinet Handles Can Transform Old Kitchen Cabinets
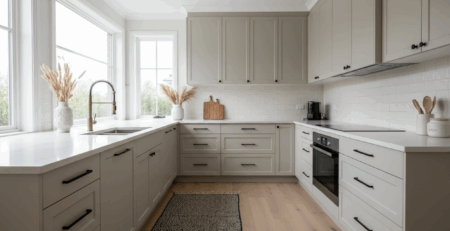
Refreshing a kitchen does not always require a full renovation. In many Australian homes, replacing cabinet handles is one...
Cabinet handles may seem like a small detail, but they play a big role in how your kitchen, wardrobe, or bathroom looks and feels. Poorly placed handles can throw off the entire design, while well-aligned ones instantly make cabinets look polished and premium. The best part is that you do not need professional experience to get it right. With proper measurements, the right tools, and a clear process, anyone can install cabinet handles neatly.
This detailed guide explains everything you need to know, from choosing the right handle size to drilling and fixing them with confidence.
Accurate measurement is the foundation of good handle installation. Once holes are drilled, there is no easy fix if the alignment is wrong. Even a slight error can make cabinets look uneven.
Correct measuring helps you:
Spending extra time on planning always pays off.
You do not need advanced tools for this task. Most items are easily available at home or local hardware stores.
A handle jig is especially useful when working on multiple cabinets, as it ensures consistency.
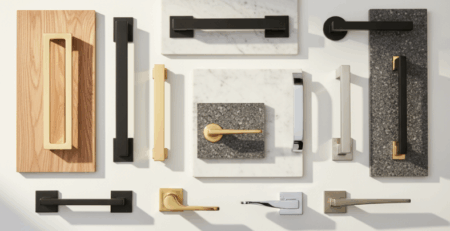
Before measuring, make sure you select the correct handle size based on cabinet type.
If you are unsure, browsing collections from Handles and More can help you visualise how different sizes work with various cabinet styles.
Drawer handles are usually placed in the centre, but the exact position matters.
Follow these steps:
For tall drawers, handles can be placed slightly above the centre for better balance. Just make sure all drawers follow the same pattern.
Cabinet doors need a different approach depending on handle orientation.
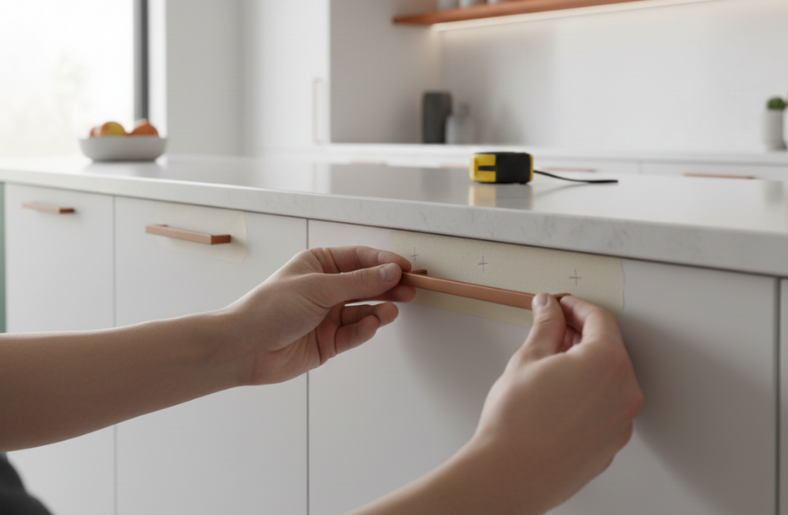
Applying masking tape over the marking area helps prevent drill slipping and protects the surface.
A template makes installation faster and more accurate, especially in kitchens with many cabinets.
You can:
A template ensures every handle sits at the same height and distance, giving a consistent look across all cabinets.
Drilling is the step where mistakes often happen, but careful handling avoids problems.
After drilling, remove the masking tape and clean the surface.
Once holes are ready, installation is simple.
Avoid over-tightening, as it can crack wood or damage laminate finishes.
Many DIY installations fail due to small but avoidable errors.
Consistency is the key to professional-looking results.
After installation, inspect your work carefully.
Good quality handles last longer and stay firm over time. Choosing durable options from Handles and More ensures both style and long-term performance.
Installing cabinet handles may look intimidating at first, but it becomes easy when done step by step. Proper measuring, careful drilling, and patience can give your cabinets a refined and finished look without professional help.
Whether you are upgrading your kitchen or refreshing old furniture, the right handles installed correctly can make a noticeable difference. Take your time, follow these guidelines, and enjoy cabinets that look neat, balanced, and well finished every day.


Refreshing a kitchen does not always require a full renovation. In many Australian homes, replacing cabinet handles is one...
When you think about doors, the first thing you probably touch is the handle. It’s such a small detail,...